Hackney Brewery – Boogie Van IPA
One of the best things about our BREW WITH US video series is learning how to take our homebrews to the next level. And our trip to Hackney Brewery was a real education!
Welcome to High Hill
Hackney Brewery began in 2011, just a few short months after The Malt Miller, and we’ve supplied them pretty much the whole time. After a while under the railway arches in Hackney, the brewery moved out to its new home in Walthamstow, where they opened their awesome High Hill taproom. It’s well worth a visit if you’re in north London, with almost as many breweries in close reach as the famous Bermondsey mile.
Hackney and BREW WITH US go back a while too – with founder brewer Jon Swain giving us feedback on our pseudo Vienna Lager in the first ever BWU video. We knew right then that we needed to get back together with Jon to learn even more!
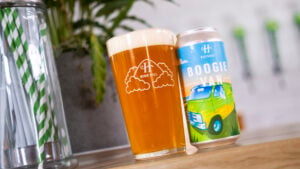
All aboard the Boogie Van
Named for a song by Californian desert rockers Fu Manchu, Hackney’s core range IPA is a super-smashable mid-coast monster with a huge variety of fruit tones from Mosaic, Azacca, and Ekuanot hops.
The beer was originally more of a West Coast-style pale ale, with more prominent bitterness and some traditional crystal malt. Over four years of brewing, the recipe has evolved to become more hop forward, with a softer malt profile and more balanced bittering – almost midway between the West and East Coast styles of IPA. The toffee notes of the crystal malt were replaced by less-sweet Munich malt to avoid a clash with the increased fruit flavours from Mosaic hops in particular.
Digging into it
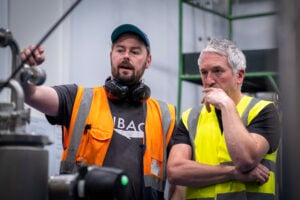
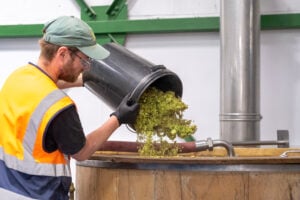
The current recipe is deceptively simple, with just Crisp Best Pale as the base malt, and Munich for colour and depth. Despite not having any oats or wheat in the malt bill, the final beer is still soft thanks to the a chloride-heavy water profile and carefully balanced hopping.
The first hop addition is Magnum at the beginning of the boil, chosen for its clean and rounded bitterness. That’s it on the hot side until the whirlpool, where a big charge of Mosaic and Azacca are added. Hackney use whole leaf for this addition, throwing it in at 80°C, then they immediately begin to run the beer off. The sheer size of a commercial brew system means that emptying the kettle takes between 45-60 minutes – with the hops in contact for that whole time.
Dry hopping won’t begin until after the beer reaches final gravity. Like many commercial breweries, Hackney complete “forced ferment” tests: they take a small sample of the wort and ferment it under lab conditions, with elevated temperatures and loads of aeration. This shows them what the FG for the main wort will be so they can plan the rest of the fermentation.
Once FG is reached, the yeast is dumped out of the fermenter. Yeast naturally sinks to the bottom of the fermenter in a process called flocculation, and this is a good thing to reduce the amount of yeast in the beer – but the same process can pull hop oils out of suspension. So removing the yeast before dry hopping means there’s less risk of the hop flavour added by the dry hop being sucked out by the yeast.
The dry hop is split into four equal charges: the beer is first reduced to 16°C, then hops are added every 24 hours over the next four days. The fermenter is “roused” with CO2 as the hops are added: carbon dioxide is bubbled into the wort to create circulation currents in the beer. Rousing like this keeps the hops in suspension and extracts more flavour and aroma than if the hops simply sank to the bottom of the fermenter.
After the final dry hop, the beer is cold crashed to help drop out the biggest hop particles. Hackney finish by centrifuging the beer to remove any remaining hop and yeast, ensuring a clean product in the can.
Yeast dumps and dry hop rousing
If you have a conical fermenter, it’s relatively simple to dump out the yeast using the bottom valve. Make sure that fermentation has completely finished, then reduce the temperature to 14°C or lower for 48 hours. This helps compact the yeast to the bottom. Make sure you have a receptacle in place to catch the dump, then open the bottom valve to start letting the yeast out.
You’ll notice the airlock bubble as the yeast is removed: if you’re worried about oxygen exposure, you can gently blow carbon dioxide into the top of your fermenter while you dump. Be careful not to pressurise the fermenter, though, so you can keep the dump under control.
The first part of the yeast dump will usually look quite greyish and powdery, then it will turn creamy and light. If you want to harvest and reuse the yeast, it’s this creamy stage you want to keep. The dump will darken again after that, which is a sign you’re getting to the end. As soon as you see beer coming through, close the valve to avoid losing too much.
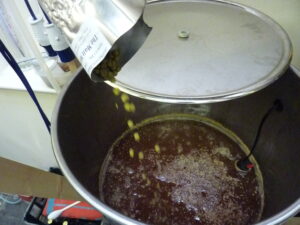
Rousing is equally straightforward. Hook up some sanitised silicone hose to your CO2 cylinder and run some gas through to purge the line – less than 5 PSI will do. Then, with the gas still flowing, push the hose onto your fermenter tap, then open the tap. The pressure of the gas will stop beer from escaping and will push CO2 into the fermenter, creating circulation within the beer. Just as with the yeast dump, you’ll see your airlock bubbling during this process as the additional CO2 escapes. Depending on how vigorously you roused, you might need to top up your airlock with extra sanitiser solution afterwards.
If you’re worried about beer flowing out of the tap and down the hose, you could use a one way check valve to prevent any liquid being sucked into your regulator.
You can do dry hop rousing with just about any fermenter with a tap, but you need a bottom valve (like on a conical fermenter) for a yeast dump. So should you rouse dry hops if you haven’t been able to dump the yeast?
As long as you’re extra careful not to disturb your yeast too much, you can still rouse – just go gently. Make sure first that you have completed fermentation and you’ve soft crashed the beer to pull as much yeast out of suspension as possible. Then use very little pressure as you rouse, just enough to bubble through the beer without creating a massive vortex. If your fermenter tap has an adjustable racking arm or dip tube, point this upwards so your CO2 doesn’t blow directly into the settled yeast bed. You’ll have to be a lot more careful than if you were able to remove the yeast, but you can still get some of the benefit of keeping the hops in suspension.
Try it yourself!
We had a brilliant time at Hackney Brewery, and Jon was kind enough to come visit us in Swindon to taste our homebrewed attempt and give us even more tips.
We’ve got two recipe kits for you, built with Jon’s guidance:
- The Boogie Van IPA kit, with full instructions and extra details on the dry hop process in particular
- The same kit plus two cans of Boogie Van for you to try and compare at home
We’re super happy with these beers – why not #brewwithus and let us know how you get along?
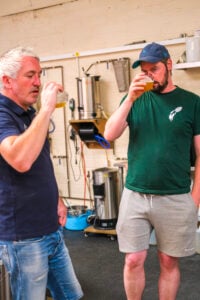
Check out our videos showing our trip to Hackney Brewery, plus Jon’s feedback on our attempt at Boogie Van! And remember to subscribe to our YouTube channel for all the latest brews and reviews from The Malt Miller.

