How to brew cider

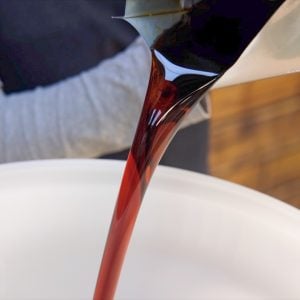
“Turbo” cider simply means using pre-prepared juice instead of starting with raw fruit. Pour some apple juice into your fermenter, bung in some yeast, and wait!
Okaaay, so there’s a little more to it than that, but honestly not much. The quality of the juice you use will make a big difference to your final product, so choose carefully. Cheaper varieties may include chemical stabilisers that taste odd when fermented, so you might look for unpasteurised juices. These are typically fresher and also made from better quality apples… but they can also be a lot more expensive. The juice not being pasteurised also carries its own risks. See our notes on pasteurisation below.
Turbo cider can sometimes be extremely dry. You might not realise just how much sugar contributes to the flavour of apple juice until it’s all been fermented out! This can also make your end product taste thin. You can “backsweeten” to help with this (more on that later).
#2: Cider from fruit

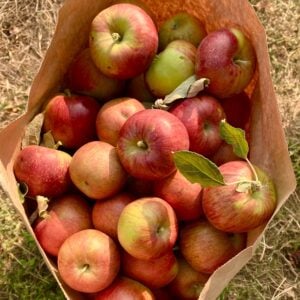
Starting with fresh fruit is the traditional way to make cider. Whether you’ve got your own trees or you’re taking excess fruit off a mate (or a friendly farmer!), this is the best way to get the full complexity and flavour of the fruit into your cider.
However, it can be labour intensive! First you need to chop the apples into small enough pieces to be pressed. You can do this by hand (good luck) or use a fruit mill, also known as a scratter. Then the chopped fruit needs to go into a fruit press to extract the juice. Phew!
With that hard work over, you have a choice. Apples naturally have wild yeast on the skins, and some of this will be present in your juice. You can choose to let these wild yeasts naturally ferment, or you can pasteurise the juice and add your own yeast. Natural fermentation can produce wonderful cider, but it comes with the risk of unexpected flavours – you don’t know what the wild yeast on the apples is or how well it will ferment.
As with turbo cider, you may want to backsweeten your final product if it’s too dry, and you can choose to drink it still or carbonate it. More on those below.
Those techy terms explained
Pasteurisation is a way of inhibiting microorganisms with heat. Heating your juice, whether shop-bought or your own pressed, to 70°C for 10 minutes will kill many wild yeasts and spoilage bacteria. Heating will alter the flavour a little and will also denature natural enzymes in the juice, such as pectin enzymes that break down haze. You would also need to chill the juice back down before adding your own yeast.
An alternative to heat pasteurisation is to add sodium metabisulphite (Campden). This is a strong antioxidant (keeping your juice from going brown) and also inhibits most spoilage organisms in cider. Use 0.25g sodium metabisulphite per litre of juice (e.g. if you had 20 litres of juice, you would need 5g sodium metabisulphite). Wait a day after dosing your juice before adding your yeast – this gives time for the sodium metabisulphite to work.
If your cider is too dry and you’d like it a bit sweeter, you can add some sweetness back in – which is very sensibly called backsweetening. There are two main ways of doing this. First, add an unfermentable sugar such as lactose. This adds sweetness that the yeast in your cider can’t ferment. You could also use sugar free sweeteners like those meant for tea and coffee.
The second option is to make your yeast go dormant with additives. You can then add more juice, honey, or any other kind of sugar you like. To deactivate your yeast, add 0.25g potassium sorbate per litre of juice. You might also choose to add sodium metabisulphite as well – again, use 0.25g per litre. Wait a day for your additives to take effect before adding any more sugars.
If you like your cider sparkling, you have a couple of options. You can add priming sugar as you would with beer – although this may not work if you used potassium sorbate to stop fermentation before backsweetening. In that case, you could force carbonate in a keg.
#3: Cider kits

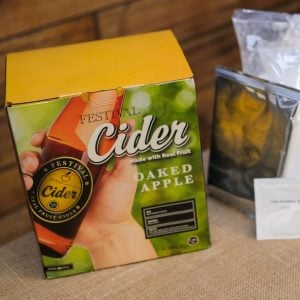
If working with freshly pressed juice sounds too much like hard work, why not try a cider kit? These are the ideal middle ground. You start with a concentrated apple juice, let it out with plain water, add the yeast included in the kit, and that’s it. Unlike a turbo cider, the juice and yeast included are specially matched together to guarantee a good balance of sweetness and body.
Most cider kits will need some extra sugars added for fermentation, such as dextrose. You could also use Mangrove Jacks Cider Enhancer, which is designed for cider kits and adds both fermentables and extra body.
Premium cider kits include extras like dried fruit, hops, and even oak chips for complex and interesting flavours. There’s a lot of choice so you’ll never be stuck for choice!
And don’t forget you can always modify these kits to your taste – leave out sweeteners for a drier finish, or add your own extra flavours (try infusing a fruit tea bag!). You can truly make these kits your own.
Check out our video on cider making and watch just how easy it can be to make one of our premium cider kits!
And don’t forget to subscribe to our YouTube channel for all the latest tips, brews, and reviews.

