Hydrometers and Refractometers
You may have seen the initials “OG” and “FG” on a recipe, but what do these mean? Original gangster? Final goal? Funky gorilla?
These are references to “specific gravity”: in short, a measurement of the density of a liquid. On this scale, 1.000 is water. Anything thicker than water (beer, blood, etc.) is higher.
You can measure specific gravity with tools like a hydrometer or a refractometer. Let’s find out how to use these and why gravity measurements are useful…
Basics
When we make beer, we dissolve sugars from malt into water, making it more dense than water alone. Yeast consumes these sugars during fermentation, so we can see how fermentation is going by checking the gravity of our brew. The beer will become less dense as the sugars are eaten up; once the gravity stops changing, we can assume the yeast is finished.
This is important as many recipes require steps to be taken at particular points in fermentation. You might see an instruction to raise the temperature for a diacetyl rest when your beer reaches a specific gravity, or to add dry hops.
Measuring the gravity of your brew gives you a true picture of the progress of your fermentation, far more so than looking at bubbles in an airlock. Even when there are no bubbles visible, fermentation can still continue, shown by small gravity drops.
Calculating alcohol
As well as showing you the progress of your fermentation, measuring gravity also lets us take a reasonable guess at the level of alcohol in the beer. When yeast eats sugars, it releases carbon dioxide (hence the bubbles through your airlock) and ethanol (alcohol). By measuring how much of the sugars in the beer have been consumed by the yeast, we can calculate a rough ABV.
To estimate the ABV, you need to know both your OG and FG. We have a calculator that will work out the ABV based on the difference between the two gravity readings:
(While you’re checking out our calculators, why not use your gravity readings to estimate the calories in your brew?)
Where do OG and FG come from?
Good recipes always include an expected OG and FG value. However, this is just an estimate, based on assumptions about the amount of sugars in the types of grain included and how efficiently these sugars can be released during the mash. In reality, OG can be affected by everything from the particular extract yield for a particular batch of malt – they can change from harvest to harvest! – as well as factors like mash temperature, water volumes, your particular equipment, etc. Similarly, your actual final gravity will depend on the specific circumstances of your mash, the health of your yeast, etc.
There are so many assumptions and interconnected variables required to calculate OG and FG values that it’s no surprise the numbers sometimes don’t line up as you expected. If you’ve ever looked at a recipe in a book or in our shop and wondered why the OG and FG numbers don’t match those that come up in your preferred recipe builder app, this can be why.
It’s vital, therefore, to take your own gravity readings so you can track how your beer actually comes out. With real data from your own brews, you may find you can adjust variables in your recipe app – such as brewhouse efficiency – to match the expected gravity values in a recipe to the way your brews actually go.
Hydrometers and refractometers
To measure the gravity of your beer you’ll need a measuring tool such as a hydrometer or refractometer.
Traditional hydrometers
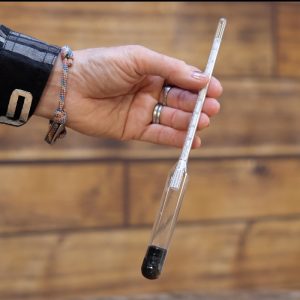
These look a bit like glass cooking thermometers, and they are weighted to float in liquid. You read the scale on the stem at the waterline.
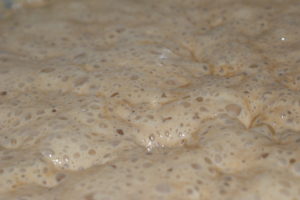
You can put the hydrometer directly into the beer in your fermenter to get a reading, but most brewers draw a sample into a trial jar first. This eliminates any risk from opening up the fermenter lid and the need to sanitise the hydrometer. If you’re mid-fermentation, the krausen (the foamy head created by the yeast) will also make it nearly impossible to read the hydrometer correctly. Pulling off a sample means you can swirl off any bubbles in the way and take your time with the reading.
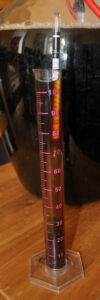
Getting a reading is really simple: just drop the hydrometer into the sample and let it settle. When it’s stable and not bobbing, look at where the waterline of your sample meets the stem of the hydrometer. In a narrow trial jar, you might see a slight curve where the liquid meets the glass stem – this is a meniscus like you see at the edge of a glass of water. Try to ignore the curve and read at the flat part of the waterline. It’s important to avoid having chunks of hop debris or yeast in your sample to help get a clear and accurate reading.
One thing to bear in mind is most traditional hydrometers are calibrated to 20°C (look on the original tube for your hydrometer to check this). If you take a reading of liquid at significantly lower or higher temperatures, it might need to be corrected for accuracy. Fortunately, we have a calculator to help:
Hydrometer correction calculator
Another thing to note about this kind of hydrometer is that, because they’re made of glass, they’re really fragile, and they are weighted to make them float. This means they have an unfortunate tendency to roll off worktops and smash just when you need them. It’s a good idea to store your hydrometer in the plastic tube it came in, and to only take it out when you’re about to make a measurement.
A good all-round hydrometer is our triple scale hydrometer. This allows you to measure from 0.990 up to 1.170 and has highlighted scales for normal beer and wine ranges. Pair this with a trial jar and you’re set for pretty much any fermentation.
If you want a little more precision in your readings, a large scale hydrometer is the key: these read smaller ranges of gravity, so the divisions on the scale are larger, making it easier to see the exact measurement. For lower gravities, use our 1.000-1.060 range hydrometer. For higher gravities, use our 1.050-1.100 range hydrometer. Depending on the beer you’re making, you may need both, or just the lower range hydrometer (a 5% ABV beer will usually start at an OG around 1.050).
Digital hydrometers
If you want frequent gravity readings (and the fun of automated data collection), a digital hydrometer is a good upgrade. These work on the same principle as traditional hydrometers – they calculate gravity based on how they float – but combine this with wireless digital technology such as Bluetooth or Wifi. They are usually designed to be left in your brew throughout fermentation, allowing you to get real-time fermentation readings without having to draw samples or open up your fermenter.
Most digital hydrometers also measure the temperature of your wort – because they are sitting right in your brew, this can be a much more accurate picture than thermometers stuck outside the fermenter.
Because they float in your fermenter, the measurements from digital hydrometers can be affected by the foam from fermentation (krausen) or floating hop debris from dry hops. This can make them a little less accurate than a traditional glass hydrometer. We prefer to use both kinds of hydrometers together – using a glass hydrometer for OG and FG readings, and a digital hydrometer to get a real time picture during fermentation.
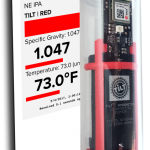
We stock several digital hydrometers. The Tilt wireless hydrometer is the original Bluetooth digital hydrometer and comes in a variety of colours – very helpful if you want to run multiple Tilts across different fermenters. The Bluetooth signal is strong enough to transmit through steel fermenters and fridge doors, but you can further extend the range with the Tilt Repeater.
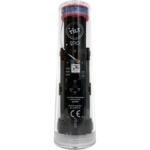
The Tilt Pro is the bigger brother to the regular Tilt and is designed for large fermenters (60 litres / half bbl and upwards). The extra size means it’s more stable through vigorous fermentations, and the sensors read to an ultra-precise four decimal places (e.g. 1.0000) for even more detail on your beer. You get improved Bluetooth range and battery life too.
Refractometers
You can also measure gravity during and after your mash. This will give you an immediate picture of how efficient your mash is, meaning you can make adjustments before your boil, such as adding malt extract to make up for a less efficient mash, or diluting down a stronger wort.
However, because hydrometers are calibrated to work best at fermentation temperatures, they are not accurate at typical mash temperatures, so for this scenario it is best to use a refractometer.
Refractometers work by passing light through a very small sample. Sugar refracts light differently than pure water, so by measuring the level of refraction you can see how much sugar is in your wort.
To use a refractometer, take a small sample from your wort. You only need a few millilitres, so a pipette or syringe is ideal for this. Put a droplet of wort onto the glass lens, close the lid, then hold the refractometer up to the light. Look through the viewing end and adjust the lens until the scale comes into focus. A line will run across the scale at the gravity reading for your sample.
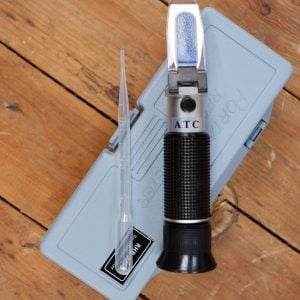
Because alcohol will affect the readings through a refractometer, you need to calculate and apply a correction factor if you use a refractometer for mid- or post-fermentation gravity readings. We find it’s overall more accurate to use a hydrometer for fermentation readings, and keep our refractometer for mash gravity readings instead.
Check out our video to see how to use hydrometers and refractometers, and remember to subscribe to our YouTube channel for all the latest brews and reviews from The Malt Miller.

