Brew With Us ESSENTIALS – keeping yeast healthy

How to train your dragon yeast
Healthy yeast is happy yeast, and happy yeast makes good beer!
So how do you keep your yeast in tiptop condition?
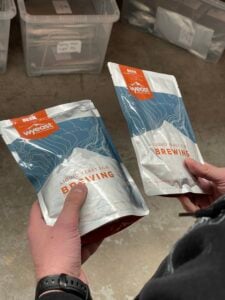
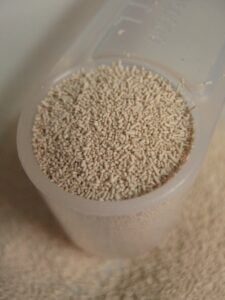
Yeast for homebrewers is available dried or as a liquid. Liquid yeast is a thick slurry, just like the yeast cake left behind after a finished fermentation. Dried yeast has gone through a process to turn it into granules.
One way to understand the difference between liquid and dried yeast is to think of gravy. Fresh homemade gravy is fantastic, but the longer you leave it, the less useable it gets. Keeping it in the fridge helps, but it still won’t last forever. Dried gravy granules, on the other hand, will keep for ages and don’t require much looking after. The major differences are that liquid yeast doesn’t go rancid, it just loses its power. And dried yeast is just as good a product as liquid – while few would argue instant gravy is as good as homemade!

There are many more liquid yeasts available compared to dried, and many special or time-limited strains are only available in liquid form. However, being a fresh product, liquid yeast has a limited shelf-life and needs looking after.
It helps to remember that yeast is a living organism. Inside a packet of liquid yeast is a colony of billions and billions of yeast cells, each waiting to get at some sugar to ferment. While the yeast sits in that packet and doesn’t get to any sugar, those yeast cells slowly begin to die off. The colony doesn’t need to be as large when there’s no food going around! As long as a small proportion of cells survive, the colony will grow back as soon as it gets some sugar – but starve it for long enough and almost all the cells will die off.
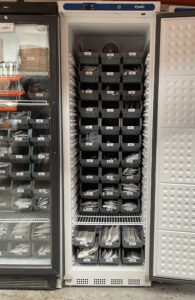
This process takes longer when the packet is kept cold. The yeast cells go into hibernation instead of immediately dying – the colony will still shrink, but it’s a much slower process. So you should always keep liquid yeast in the fridge to help it last longer. Like other fresh products, a short time in the warm won’t spell instant doom, but try not to leave the packet out for more than a few days. On the other hand, be careful not to freeze it – this can harm the yeast.
A balloon full of yeast?
Sometimes packets of liquid yeast swell up and turn into little balloons! Commercial yeast labs grow big cultures of each yeast ready to pack up, and sometimes trace amounts of the food used to grow the yeast ends up in the packet – the poor starving yeast pounces on this and, as always, releases carbon dioxide. Some strains are more ravenous than others and almost always swell up their packets!
So long as the packet doesn’t burst, there is nothing wrong with a swollen packet. As always, keeping it cold can help reduce swelling and is the best way to keep your yeast in good condition before use.

The date on a packet of liquid yeast gives you a guide to how fresh and healthy the colony inside is. It can be tricky to work out the freshness of a particular packet of liquid yeast because different yeast labs give different estimates of shelf-life and package different amounts of yeast, and some quote the manufactured date instead of an expiry date.
For example, White Labs, who have a very large range of strains available, provide 100 billion cells of yeast per packet, with a four-month date. This date is based on 100% of those 100 billion cells being “viable” (healthy) at the beginning of the period, and less than 5% being viable by the end.
Imperial Labs, on the other hand, keep a smaller selection available but put 200 billion cells into each packet, with a three-month date – and they vouch that the yeast will still be useable at that three-month mark (and may last “much longer”). So not everyone is counting down from the same starting point or to the same end point!
Starter up
As long as there are some yeast cells alive in your packet, the colony will grow once it gets some sugar. If the colony is very weak, though, it may struggle to get going with beer – like a starving man presented with haute cuisine. To make life easier for the colony, you can make a yeast starter. This is a really simple, fairly weak wort that is the equivalent of a nursery slope for the yeast, giving it an easy place to grow before the colony meets real beer. You can even do this to get extra uses from a single packet of liquid yeast, which helps offset the cost!
To make a starter, dissolve 100g of dried malt extract (DME) in one litre of boiling water. Pour this into a sanitised flask or jug and cover the top with sanitised tinfoil. Then cool the starter wort down to room temperature – you can use an ice bath to speed things up. Once cooled, pitch your yeast and replace the tinfoil.
Keep the starter at room temperature, even for lager yeasts, to help it grow faster. This isn’t beer you want to drink – it’s all about getting as much yeast as quickly as possible! The starter should take about 24-36 hours to reach high krausen, though the older the yeast is, the longer this can take.
When ready, you can pitch the whole starter into your beer. You can also chill the starter down first and decant the used wort off the top so you only pitch pure yeast.
If you need more yeast, you can make a bigger starter – e.g. 150g DME in 1.5L water, 200g in 2L, etc. You could also add more starter wort to your original – i.e. add another cooled solution of 100g DME in 1L water to a previous 1L starter. Doing multiple small steps like this can put less strain on the yeast colony, so if you want a lot of yeast from a particularly old packet, this is a good approach. For really big starters, it’s a good idea to decant off the used wort to avoid diluting your beer too much.


Making a successful yeast starter pretty much guarantees the yeast will be awake and ready to go, so some brewers make starters every time they use liquid yeast, regardless of the manufacturers’ date. We definitely recommend making a starter if your packet is within the last few weeks of its date, or if you want a higher pitching rate than usual (more on pitching rates in a later chapter).
Dried yeast

Liquid yeast definitely takes some looking after, so many brewers prefer to use dried yeast. Not all yeasts take well to being dried and the process requires special equipment, so there is a smaller range, but dried yeasts are generally less expensive and contain a reliable amount of yeast cells. We still recommend keeping packets of dried yeast in the fridge if you’re storing them for a long time, but that’s about all – a few days out of the cold won’t affect them at all.
You also don’t need to make yeast starters when using dried yeast. The drying process means these yeasts are happiest going straight into beer, and if you need a higher pitching rate you just add another packet. Some manufacturers suggest rehydrating the packet in a little water before pitching into beer – it’s up to you if you want to add this extra step.
A Wit-ty comeback?
We’ve met the “clean” ale and lager yeasts – now it’s time to get spicy!
Wit, weizen, and saison strains bring a whole new dimension of yeast flavours.
Plus we’ll introduce the viking yeasts storming the world of beer…


