Brewing pumps explained
A pump is a great addition to almost any brewing set up. Here’s our quick guide to where you’d use a pump and how to get the best results.
Why would I want a pump?
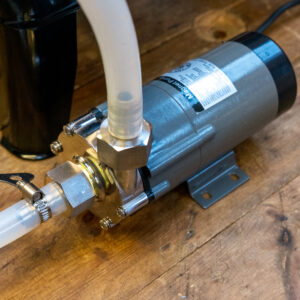
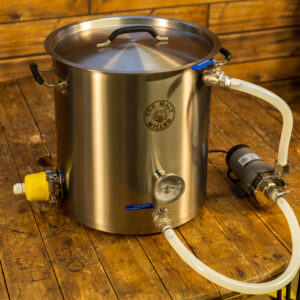
Pumps come in whenever you want to move your wort in and out of your brewing vessels. For instance, if have a three vessel setup, a pump helps you move the wort from your mash or lauter tun across to your boil kettle. When you’re working with anything but the smallest batch sizes, it is impractical and unsafe to lift and shunt around pots of hot wort! A pump makes this a simple, safe, and clean job.
You can also use a pump in a single vessel set up to recirculate your wort. You can do this during your mash to help improve your efficiency. You can also recirculate at the end of the boil to create a whirlpool, which will gather all the trub (and any pellet hops) to the centre of your vessel so you can then pull clear wort from the edge.
If you use an external chiller – such as a plate or counterflow chiller – a pump can increase the flow rate through the chiller and help improve chilling performance. With a counterflow chiller you can even recirculate the cooled wort back into the kettle to compound the chilling effect and really speed up cooling. You can also use a pump with an immersion chiller to recirculate the wort over the chiller coils. Again, this can massively speed up your cooling.
How do I set up a pump?
Pumps made for brewing must always be “primed” with liquid before turning them on. Running a brewing pump dry can cause real damage to the internals and, if nothing else, usually causes an ear-destroying screeching and rattling noise! Position your pump where the inlet is below your vessel so that you can easily prime it through gravity, just by opening the valve on your vessel. The inlet of a pump is usually at the bottom and the outlet above it – this means that as it primes, any air in the pump is pushed out and you won’t get air bubbles inside. Having trapped air bubbles is called “cavitation” and has a similar effect to running the pump dry.
You can control the flow rate on most brewing pumps by adding a simple ball valve to the outlet side. This allows you to throttle back by closing the valve. The pump inlet should never be restricted to avoid it running dry as above.
Adding a recirculation line
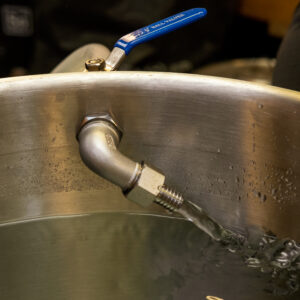
Our Complete All-grain brewing system comes complete with both a pump and an additional valve at the top of the kettle, with an angled hose fitting inside. This is specifically designed for mash recirculation and whirlpooling and in our tests it works brilliantly well!
Simply connect the bottom outlet of the kettle to the pump inlet with silicone tubing, then use more tubing to connect the outlet of the pump to the upper valve on the kettle. Control the speed of the recirculation using the upper ball valve, and adjust the angle of the flow with the hose fitting to get the ideal whirlpool whatever volume you have in your kettle.
You can add a whirlpool fitting to any of our kettles by selecting an additional 21mm hole to be cut in your pot. You can then install our whirlpool kit. We recommend adding a ball valve to the outside for the same level of control as on our Complete system. Don’t forget either a hose barb or camlock fitting for the valve to make hooking up and dismantling your whirlpool line as simple as possible.
Cleaning your pump is really simple with this kind of recirculation line. After you finish your brew, detach the hose from the upper valve and direct it to a bucket. Add clean water into your kettle, open the bottom valve, turn on the pump and flush until clean water flows. Then reattach the recirculation line to the upper valve, add more water and an alkaline cleaner such as ChemClean or PBW to your kettle. Recirculate this solution for a few minutes, then drain and flush with more clean water as above.
Our range of pumps
We stock three different types of pumps. As always at The Malt Miller, we are happy to recommend any of these – we stand by all our products.
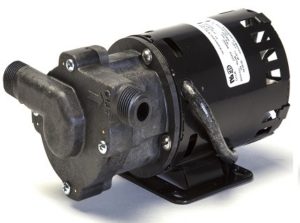
The March May line of pumps are designed specifically for brewing and are built in the UK. You can choose from the 809 with a horizontal inlet and outlet or the 815 with vertical inlet and outlet. These are both powerful bits of kit and will breeze through all your wort transfer needs. Please note these need to be wired up for a UK plug.
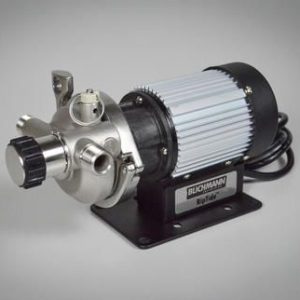
The Blichmann RipTide pump has some great additional features to make life easier. The main head attaches to the body using a large tri-clamp fitting, which means you can easily dismantle it to clean inside. There’s also an air release valve in case any air pockets form in the head, and a built in flow control valve. The standard model comes with ½” NPT connections (compatible with ½” BSP), and you can also get the tri-clamp model which has 1.5” tri-clamp connections for the inlet and outlet. The RipTide ships with a European plug with a UK converter bundled in.
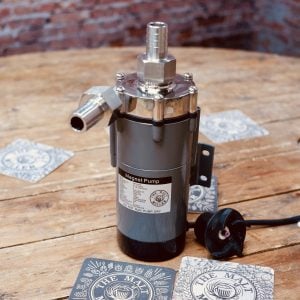
Last but by no means least is our own Malt Miller magnetic pump. This comes with two hose barb fittings, a fully wired 3-pin UK plug, and a spare impeller in case the pump is accidentally damaged by running it dry – we know this can happen! Another great feature of our pump is the offset design, with a horizontal inlet and vertical outlet. This takes up less space and means less chance of hoses kinking and blocking your flow.
Check out our video on brewing pumps, and remember to subscribe to our YouTube channel for all the latest brews and reviews from The Malt Miller.

