Livin’ on the veg – ferment your own vegetables!
We’ll ferment just about anything here at The Malt Miller. Beer, cider, wine… even vegetables! Find out all about fermenting veg in our simple guide.
What can I make?
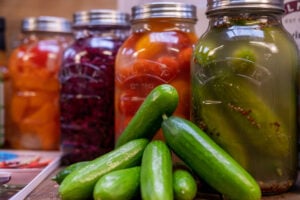
You can ferment just about any kind of veg, really. Some of our favourites are cucumbers, bell peppers and chilli peppers, and cabbage.
The fermentation uses the natural lactic acid bacteria present on the skins of your veg, which gives the end product a sharp, slightly fizzy tang. We love it!
The process is simple – submerge your veg in a salt brine, add any flavours you want, then just leave the mixture alone for a week or so. Sounds good? Check out our detailed recipe below.
What do I need?
You’ll need a vessel large enough to fit your veg inside, and some way of keeping the air out. These specialist jars from Kilner are perfect: they come in one and three litre sizes and feature airlocks in the lids.
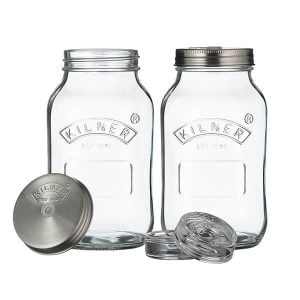
You also need something to keep the veg below the surface of the brine. This prevents the veg from drying out and shrivelling up, and also stops the veg going mouldy. A glass or ceramic weight such as the ones included in the kits above is perfect. You could also fill a plastic sandwich bag with water and lay it on top of the veg. The bag will flatten out and keep the veg underneath with the weight of the water.
How to do it
Let’s make some gherkins – perfect for hot dogs and burgers!
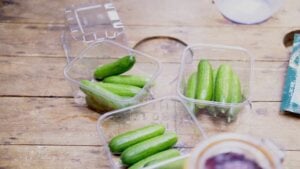
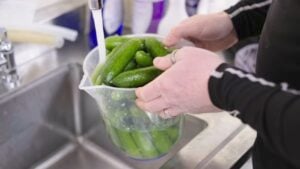
Start with the freshest cucumbers you can get. We used mini cucumbers from the supermarket, but if you grow your own that’s even better! Gently wash the cucumbers to get rid of any soil or dirt, but don’t scrub it. You want to leave the lactic acid bacteria on the surface, plus any scrapes or gouges might go bad.
Wash your jar with warm soapy water – you don’t need to do a full sanitisation like you would with beer making equipment. Push the washed cucumbers into the jar. You want the jar to be relatively full, enough so that the cucumbers will stay where they are and won’t float around in the brine.
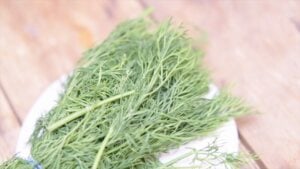
Now add any flavourings you want. We suggest fresh dill, coriander seeds and mustard seeds. The pickling process will really accentuate any flavours you add – ask us about the time we added chilli flakes, crikey! – so you don’t need much. We’re using about two tablespoons of each of the seeds, and about 9-10 stalks of dill. We keep the dill as whole stalks as when we’ve tried smaller chopped up pieces they just float on the surface and don’t extract as much flavour.
Next make up your brine with a mixture of salt and water. You want 2.5g of salt for every 100ml of water, so for our 3L of water that’s 75g of salt. Finer salt will dissolve more easily than chunky sea salt, though some very fine table salts use iodine and other anti-caking agents to prevent it sticking together. These agents do not affect the fermentation as is popularly thought, but they can make your brine go milky or form a deposit at the bottom of the jar, neither of which is particularly appetising.
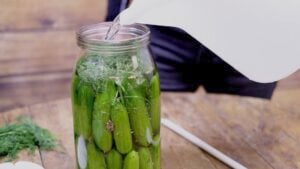
Gently pour the brine over the cucumbers until they are completely covered, leaving empty headspace of about 6.5cm (two and a half inches) to allow room for movement during fermentation. Put in the weights (or your bag of water) to hold the cucumbers under, then close the lid. If you are using a lid with an airlock, you can fill the airlock with some leftover brine.
Fermentation should take between one to two weeks. You will see bubbles in the pickling liquid, which should escape through your airlock. The gherkins will get sharper and sourer the longer you leave them, so exactly how long you wait is up to you – ten days is about right for us. We suggest starting there and you can increase or decrease the timing based on your results.
When you want to stop fermentation, simply put the jar in the fridge, and the cold will freeze the process. Your pickles will keep for ages if kept cold. Make sure the gherkins stay under the level of brine to stop them shrivelling up or going mouldy. Skim off any scum you see on the surface of the brine, and if you do see mould growing it’s best to ditch the jar and make some fresh.
Can I pickle it? (yes, you can)
As well as gherkins, we’ve successfully fermented tomatoes, chillies, bell peppers, red cabbage, even sweetcorn!
Sauerkraut is made by starting with finely shredded cabbage. Scrunch it up with salt as described above and that’s about it – easy! You can try flavouring your sauerkraut with caraway seeds, or mixing in some shredded carrot. Apples also go really well, as do cranberries. You can either eat your sauerkraut cold as a salad, or warm – a bit of paprika tastes great as a seasoning.

Kimchi is another kind of pickled cabbage, and the national dish of South Korea. This time the cabbages are kept whole rather than being shredded. The pickling salt is mixed with gochugaru (Korean chilli flakes), garlic, ginger, spring onions, and fish sauce, all turned into a thick paste with glutinous rice flour. This mixture is massaged over both sides of each leave of the cabbage by hand – you’ll want to wear gloves to avoid tingly fingers from all that salt and chilli!
You can buy kimchi seasoning mix and the base ingredients in specialist supermarkets, and if you’ve got the taste for kimchi, you’ll definitely want to seek these out to get the authentic flavour!
We are far from experts on fermenting your vegetables – we’re just experimenting! Some of the experts we suggest following are Joshua Weissman and Pro Home Cooks on YouTube. We also highly recommend The Fermentation Kitchen recipe book, which is full of great tips and techniques. Have fun and let us know how you get on!

Check out our video about fermenting vegetables, and remember to subscribe to our YouTube channel for all the latest brews and reviews from The Malt Miller.
We are far from experts on this subject – we’re just experimenting! Some of the experts we recommend following are Joshua Weissman and Pro Home Cooks on YouTube. Have fun and let us know how you get on!

