Our kegerator build
So we have recently built a new kegerator for serving our beers at The Malt Miller, well you can’t have a work place without beer on tap, not when thats your business, and we do like to offer a beer to anyone that pays us a visit. It was also needed for our visit to Brew Con, where we were able to serve up a couple of our beers to everyone that came to talk to us.
We will include links to the parts that we used in the build so you can easily see how all of these fit together and add them to your basket if you decide to do this project yourself at home.
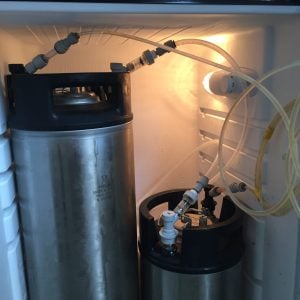
First step was to source a fridge, you can do this either by mentioning that you should upgrade the one in the kitchen or by searching eBay for something locally or by buying a new one, this is totally up to you. We brought a new fridge for this build, we went for a LEC free standing fridge, after checking out the internal dimensions. There is one thing with this fridge though, due to the position of the temperature controller we can’t fit two new kegs in there, but we can fit 1 new 19ltr and 1 recon keg, or 1 new 19ltr and 1 new 9ltr in there, so just think about this and try to understand the internal dimensions and restrictions in advance.
Taps and liquid
We have a great range of taps available for you to personalise your kegerator, we love having flow control so that was naturally going to be our choice for the build as these give you that extra control over the beer flow, UltraTap or Nukatap, or the top of the Perlic taps all perform really well. Don’t forget to choose a handle to go on them too, you can go for something standard or make a custom handle yourself.
To mount these on the doors we use the Long Shank, which passes through a 21mm hole that we drilled in the door. This gets passed through the door, remember to leave the black collar on the outside of the door, then from the inside you tighten up the brass nut. You could also mount the taps on the side of the fridge, the benefit of this is that you aren’t disturbing the beer lines each time you open the door.
Once the shank is fitted you can then fit the tap, having a font spanner helps as this will grip the neck of the tap and get it tight, although you don’t want to over tighten it as you will at some point be wanting to remove them to give them a clean and to sanitise thoroughly.
From the Shank we then use a 3/8 to 5/8 John Guest adaptor that screws onto the the shank, and our preference is to then reduce the line down to 3/16 to aid with restricting the flow of the beer to prevent fobbing when you pour it. Then run a few meters of 3/16 beer line, perhaps start with 2 meters and reduce it down until you find the speed of pour that you are happy with through the taps, or you could just use 3/8 line but the flow will be faster, it all depends on the pressure you like to serve at and is a bit of a game of finding what works best for you.
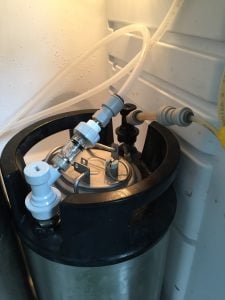
Then to attach to the keg we use John Guest 1/4 FFL to 3/8 which connects onto a threaded liquid disconnect, which also has a small section of 3/8 beer line into a 3/8 to 3/16 reducer, this then allows you to connect the line from the tap to the keg.
Gas
Getting gas to your kegs, you can do this in a number of ways, either by drilling a hole and passing a line through the side or top of the fridge, but do be careful that you’re not going to hit anything important if you choose this method.
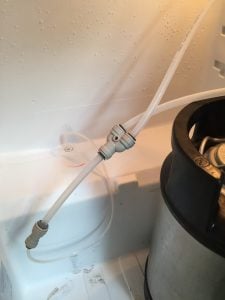
To avoid this we decide to take another route, we will pass our gas line through the drainage hole of the fridge. To do this we connect 3/8 line from the regulator, then use a reducer to drop the size to 3/16 then when its back in the fridge we increase it back up to 3/8 line with the same John Guest fitting again. Then because we want to feed the two kegs at the same time we also put a line splitter on the gas, then feed these off to each keg.
Connecting to the keg we then use John Guest 1/4 FFL to 3/8 again, which fit onto a no return disconnect check valve screwed onto threaded gas disconnects. The check valve is a great addition, these stop any liquid travelling up the line and ruining your regulator and help to maintain the pressure in each keg.
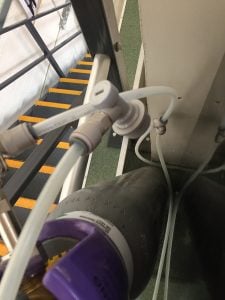
Something you might want to think about is that occasionally you will want to purge a keg of O2 or pressurise a keg outside of the fridge, maybe during cleaning or to force carb, so it can be useful to have another line splitter outside of the fridge that runs to a gas line for this purpose, this is totally up to you.
Just remember that each of the gas lines need to have something on the end to stop you loosing gas out your bottle as this is all one open loop, so if you’re only running one keg in there and have two gas lines you need to have a disconnect or a John Guest with a plug on it to stop the gas, if you were to disconnect something that you’re not supposed to you’ll soon see exactly what we mean as you’ll hear the CO2 hissing at you.
As well as the above guide we filmed our build, it took us under an hour to put together and that was even whilst filming it, so it should take you about 30 minutes to put this together if you’ve got everything ready and to hand when you start. Be sure to tag us in your photos on any of the Facebook groups when you do this project as we love to see your work.

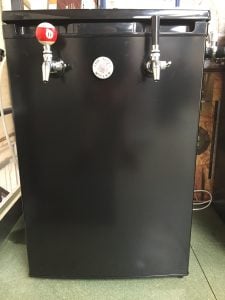
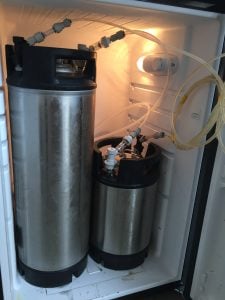
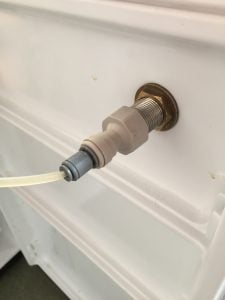
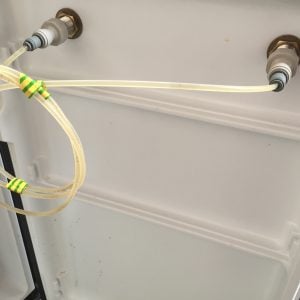

Thanks to Martin for his personal demo of the Kegerator at Brewcon 2018
It is the quality of the build and the simplicity of actually achieving such a finish that will be the key factor in my embarking on this project in the new year.
I’ve done lots of research in to building my own Kegerator, but none of the blogs or youtube clips are as good as this.
The video is very informative and this along with the comprehensive guide will make my attempts at building a carbon copy hopefully pretty easy.
Big thanks to all at the MaltMiller…keep up the good work
Glad it helped Martin, I’m pretty rubbish at DIY stuff, so surprised myself how easy it was to do this so hopefully everyone should be able to put one of these together.
Had a demo of the Malt Miller Kegarator when I called in this summer as well as some welcome advice buying the parts for my build.
Just to share, and after a lot of measuring and taking kegs into shops, I bought a Faure fra25600wa fridge for my build that fits four tall AEB kegs with room for the regulators (bought the fridge in France but is available on Amazon UK).
Hope that your kegerator is still performing well. I’m very interested in what you have done as my local store (here in France) is selling these fridges at a decent price & I’m tempted to go down the route that you have gone. Any tips on where to drill would be most appreciated!
In my experience there are no pipes or wires to worry about in fridge doors. Fridges mainly have the cooling pipes at the back only. You may find if there is a thermostat there will be wires running to that, if you unscrew it you cam normally see where they go.
This looks great! What’s the reason you can fit one new 19L keg and one reconditioned 19L keg, but not two new kegs? What’s different size-wise about the reconditioned kegs? Thanks
Hi Richard, Some fridges have a thermostat and light located towards the top of the side of the fridge. This often stops getting two of the new taller kegs in but because the recon kegs are shorter they fit under the thermostat. As the recon kegs are fatter in diameter we have not seen a fridge that will accommodate two of them side by side. It is quite easy to take out the thermostat / light from a fridge, it can then be run from an INKBIRD. The actual sizes of the kegs are on the product pages.
I bought a Hisense RR330D4OC2UK. It can fit in 4 AEG kegs (the tall ones). although I replaced the glass shelf with a plywood one. It can also fit two of the wider ones side by side, but then you are limited to three kegs, but this is consistent with the commercial ones which have the same limitations.