Brew With Us ESSENTIALS – mineral adjustments

All in the profile
We’ve carefully noted the calcium, sulphate, and other levels from our water report.
So what do they mean?
There were several different minerals and chemical compounds we mentioned last time:
- Calcium (chemical symbol Ca)
- Magnesium (Mg)
- Sodium (Na)
- Sulphate (SO4)
- Chloride (Cl)
There are lots of different minerals and compounds found in beer, but these five have some of the strongest influence in brewing. We also mentioned alkalinity and pH, which we’ll cover off next time.
The levels of these five minerals are usually listed in ppm (parts per million) or mg/l (milligrams per litre). When dealing with water, these numbers are actually the same – 1ppm is the same as 1mg/l. A milligram is one-thousandth of a gram, so 1000mg is the same as 1g.
As these measurements suggest, just small amounts of minerals can make a big difference to your liquor, so if you choose to adjust them it is best to use a brewing water calculator. More on using a water calculator in the next chapters.
Calcium
Yoghurt makers would have us believe calcium is only good for growing teeth and bones, but it’s very important to your brew. The right amount of calcium can improve sparging performance, wort clarity, stability, and even the colour of your beer!
Because calcium can contribute to hard water, it is often removed from tap water by household water softeners. High levels of calcium can also lead to a “minerally” taste. A good level for most styles of beer is between 50 and 200mg/l – we recommend aiming for around 100mg/l.

Magnesium
Most waters have low levels of magnesium, but malt contains a relatively large amount. Magnesium is an important yeast nutrient, but in too large a quantity (over 30mg/l in the brewing liquor) it can give your beer a slightly bitter metallic flavour. Some of the salts used to adjust other parts of your water profile can add magnesium, so it’s important to keep an eye on this level to avoid issues.
Sodium

Sodium is best known to us as salt (sodium chloride), and if you remember our coffee experiment from earlier, you’ll know that small amounts of salt can help build the impression of body and sweetness in your beer – a bit like how adding dark shadows can increase the impression of brightness in a picture. However, too much will add an obvious saltiness, which is only acceptable in a few beer styles (such as gose). The level of perceived saltiness depends on the balance of the beer: a bitter, hop-forward style like a West Coast IPA can take a lot less than a more malty style like porter or stout. As a rule of thumb, it’s best to stick to under 50mg/l sodium.
Sulphate and chloride
These two are groups of chemical compounds as opposed to single minerals. For example, calcium sulphate (better known as gypsum) and magnesium sulphate (Epsom salts) both contain sulphates along with the calcium and magnesium. Similarly, calcium chloride and sodium chloride (table salt) both contain chlorides as well as calcium and sodium.
Sulphates and chlorides are best thought of a balance. When both are at similar levels, they won’t have a strong impact on the flavour of your beer: this is a “balanced” flavour and is ideal for many styles. If you have more chlorides than sulphates, your beer will seem softer and smoother, with a full malty mouthfeel. Favouring sulphates over chlorides, gives a sharper and more prominent perception of bitterness, with a cleaner finish. Obviously your beer itself is no more malty or bitter – the number of IBUs extracted from your hops won’t change! – it’s simply the way this maltiness and bitterness is presented.
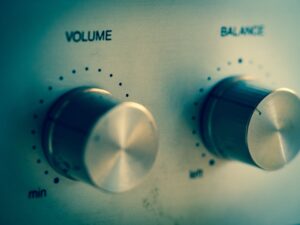
You can think of this like the EQ dial on a speaker. Turn it one way and you get more bass, go the other way for more treble, or leave it in the middle for a nice balance.

The relative number of sulphates and chlorides in your liquor can be written as a fraction, e.g. 1.2 or 0.8, etc. “1” indicates an equal balance.
These are some common descriptions of the ratios:
To work out the fraction in your liquor, divide the amount of sulphates by the amount of chlorides. For example, if you had 200mg/l sulphates and 50mg/l chlorides, the fraction would be 4 (“very bitter”). Likewise, 100 mg/l sulphates and 150mg/l chlorides gives you a fraction of 0.67 (“malty”). Most water calculators will work out the sulphate to chloride ratio for you.
The total amount of sulphates and chlorides is important as well as the ratio between them. Below a combined total of 100mg/l, the levels are too low to have much meaning. One bottled water commonly used for brewing has only 10mg/l sulphates and 12mg/l chlorides, so 22mg/l total. Either of both of these levels would need to be boosted significantly for there to be a noticeable flavour impact.
However, as with most other minerals and chemicals, excessive levels of either sulphate or chloride can taste harsh. It’s best to stick to use less than 350mg/l sulphates and less than 250mg/l chlorides. This gives us quite a large range between the minimum and maximum levels, so there is plenty of room to achieve the ratio we’re looking for.
Increasing sulphates or chlorides usually means increasing one of the other minerals. For instance, adding Epsom salts (magnesium sulphate) will give us both sulphates and magnesium. The upper limit for sulphates is a lot higher than the maximum for magnesium (just 30mg/l as above), so be careful. It’s important to keep an eye on the other mineral levels when working out an addition for sulphates and chlorides and make sure you don’t exceed the recommended limits.
Taste the difference!
We love a tasting experiment, and this time we’re going to use beer! You’ll also need some gypsum (calcium sulphate) and some calcium chloride.
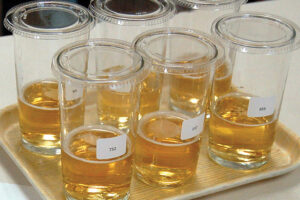
Start with about 500ml of relatively neutral beer: something like a “lite” American lager is ideal. Pour out equal 100ml measures. One of these will be your “control” sample to remind yourself how the beer normally tastes, so mark that one and put it aside.

Take one of the other measures and add a tiny amount of gypsum – if you have a set of jewellers’ scales, you want about 0.2-0.3g! If you don’t have scales, use the handle of a small spoon and get just a small amount. Add it to the beer and swirl it around to dissolve it. Note down which sample this is and put it aside.
Take another measure and this time add calcium chloride to it. You want about the same amount, 0.2-0.3g. Calcium chloride comes in flakes so two small flakes should be about right. Again, make a note of which sample is which.
Repeat the process a third time, this time adding both gypsum and calcium chloride, again about 0.2-0.3g of each.
You should now have:
- Control (no alterations)
- Gypsum added (more sulphates)
- Calcium chloride added (more chlorides)
- Both gypsum and calcium chloride added (more minerals in total)
Now taste! Sip each sample in turn, beginning and ending with the unaltered control. What differences did you taste? Which did you like best?
Now repeat the experiment with different beers. Try a modern IPA, or a best bitter. Or how about a stout? Depending on the mineral profiles of the source beers, you may not notice as much difference between samples as with the neutral “lite” beer. But you may even be able to take a guess at what kind of mineral profile these other beers started with by referring back to that “lite” beer and the differences in the first experiment. Try it out!
Next time: acid basics
Managing pH is one of the most important parts of mastering your brewing water – we unlock the secrets in our next chapter…


