Brew With Us ESSENTIALS – treating your liquor

And the answer is…
By now we have everything we need to start treating our water.
It’s time to get out the calculator!
There are a lot of variables to account for when working out changes to your water. Fortunately, there are several very good brewing water calculators available that will do the heavy lifting for you. Phew!
Some of the most commonly used software calculators are built into the Brewers Friend recipe builder, Beersmith, and the Grainfather Recipe Creator app.
Start with the source
For most calculators, you will need to input details of your source water. These are the numbers we noted down from the water report or bottled water label, measured in mg/l or ppm. As a reminder, you need to know:

- Calcium (chemical symbol Ca)
- Magnesium (Mg)
- Sodium (Na)
- Sulphate (SO4)
- Chloride (Cl)
- Alkalinity (also labelled as bicarbonate, usually measured as CaCO3)
- pH
For reverse osmosis water, you can assume a pH of exactly 7, with all the other numbers at zero. You will need to tell the calculator if you’re diluting your water, or reducing the alkalinity by boiling or using slaked lime.
The calculator will also need to know details of your malt bill, as well as how much liquor is in your mash and in your sparge. A thinner mash will have a greater buffering effect because there is more water to begin with – so more alkalinity to get through before you can reduce the pH. This all needs to be accounted for in the calculations.
Hit the pH target
Step one after entering all the information is to get to the right pH level of 5.2-5.6.
Some calculators will try to automatically work out how much acid you need to add to get into this range. With others, you can manually add an acid and see how it affect the pH. It’s best to start with small amounts and gradually increase them. If you’re using lactic acid, remember that you should aim to use less than 0.25ml per litre of liquor (across both mash and sparge liquor) to avoid being able to taste a “lactic tang”.
If your liquor has a very low level of alkalinity, for instance if you use 100% reverse osmosis water, you may find the pH doesn’t need much adjustment. If you brew a beer with lots of dark malts (which are naturally more acidic than paler base malts) you may find you don’t need to add any acids to your liquor at all. In fact, you may even need to raise the pH up!

The simplest way to do this is to use sodium bicarbonate, also known as baking soda or bicarbonate of soda (this is not to be confused with baking powder, which usually includes other additives as well as sodium bicarbonate). This needs to be measured carefully to avoid adding too much sodium and giving your beer a salty taste, so keep an eye on the sodium levels in the calculator as you work out your dose.
You can also use slaked lime (calcium hydroxide), though this is much more powerful so be careful and make sure wear gloves whenever handling it. Lastly, you can add chalk (calcium carbonate). Chalk is difficult to dissolve at normal mash temperatures, so many calculators assume it will be under 50% effective at raising the pH, with the rest simply dropping to the bottom of your mash tun. The actual effectiveness may vary widely from this; sodium bicarbonate or slaked lime are more predictable ways to raise the pH.
Adjusting the mineral profile
Once the mash pH is in the right range, the next thing to look at is the mineral balance. Depending on your source water, this may need a lot of adjustment or very little. RO water can need quite a few minerals added to build the correct profile. It’s worth noting that AMS acid (also known as CRS) will add both sulphate and chloride to your mineral profile as well as adjusting the pH. A good water calculator will take this into account.
There are two approaches to adjusting your mineral profile. One is to leave it relatively unchanged, and focus on the sulphate and chloride ratio. The other is to start with a target profile and try to add minerals to mimic the target. There are dozens of target profiles brewers use, and most calculators have lots of these built in. These are a great shortcut if you’re unsure what profile to aim for.

Whether you use a target profile or just adjust the sulphate and chloride ratio, you should keep an eye on the total levels of minerals to make sure they are each in the safe range. Some published water profiles are very close to the maximum levels recommended and it is easy to stray above the maximum when trying to mimic these.
As a reminder, the suggested limits are:
- Calcium (Ca): between 50-200mg/l (100 is recommended)
- Magnesium (Mg): under 30mg/l
- Sodium (Na): under 50mg/l
- Sulphate (SO4): under 350mg/l
- Chloride (Cl): under 250mg/l
It’s also best to have at least 100mg/l total sulphates and chlorides if you’re focusing on a particular sulphate to chloride ratio, as below this level the ratio doesn’t make much difference.
As you’re adding your minerals, you will notice that the mash pH changes by small amounts. This is because some minerals will lower pH and others (e.g. sodium bicarbonate) will raise it. Most of the time the amount of minerals you add won’t be enough to push you out of the correct mash pH range, but if they do, go back to the previous step and adjust the amount of acids (or alkalis) you’re using. Don’t forget that AMS will change the proportions of sulphate and chloride, so you will need to check your sulphate to chloride ratio when you come back to this step.
Is it brew day yet?
With all your calculations done, it’s finally time to start brewing! We know that different water treatment products need to be added at different times, so here’s a rough timeline of how you’ll treat your water.
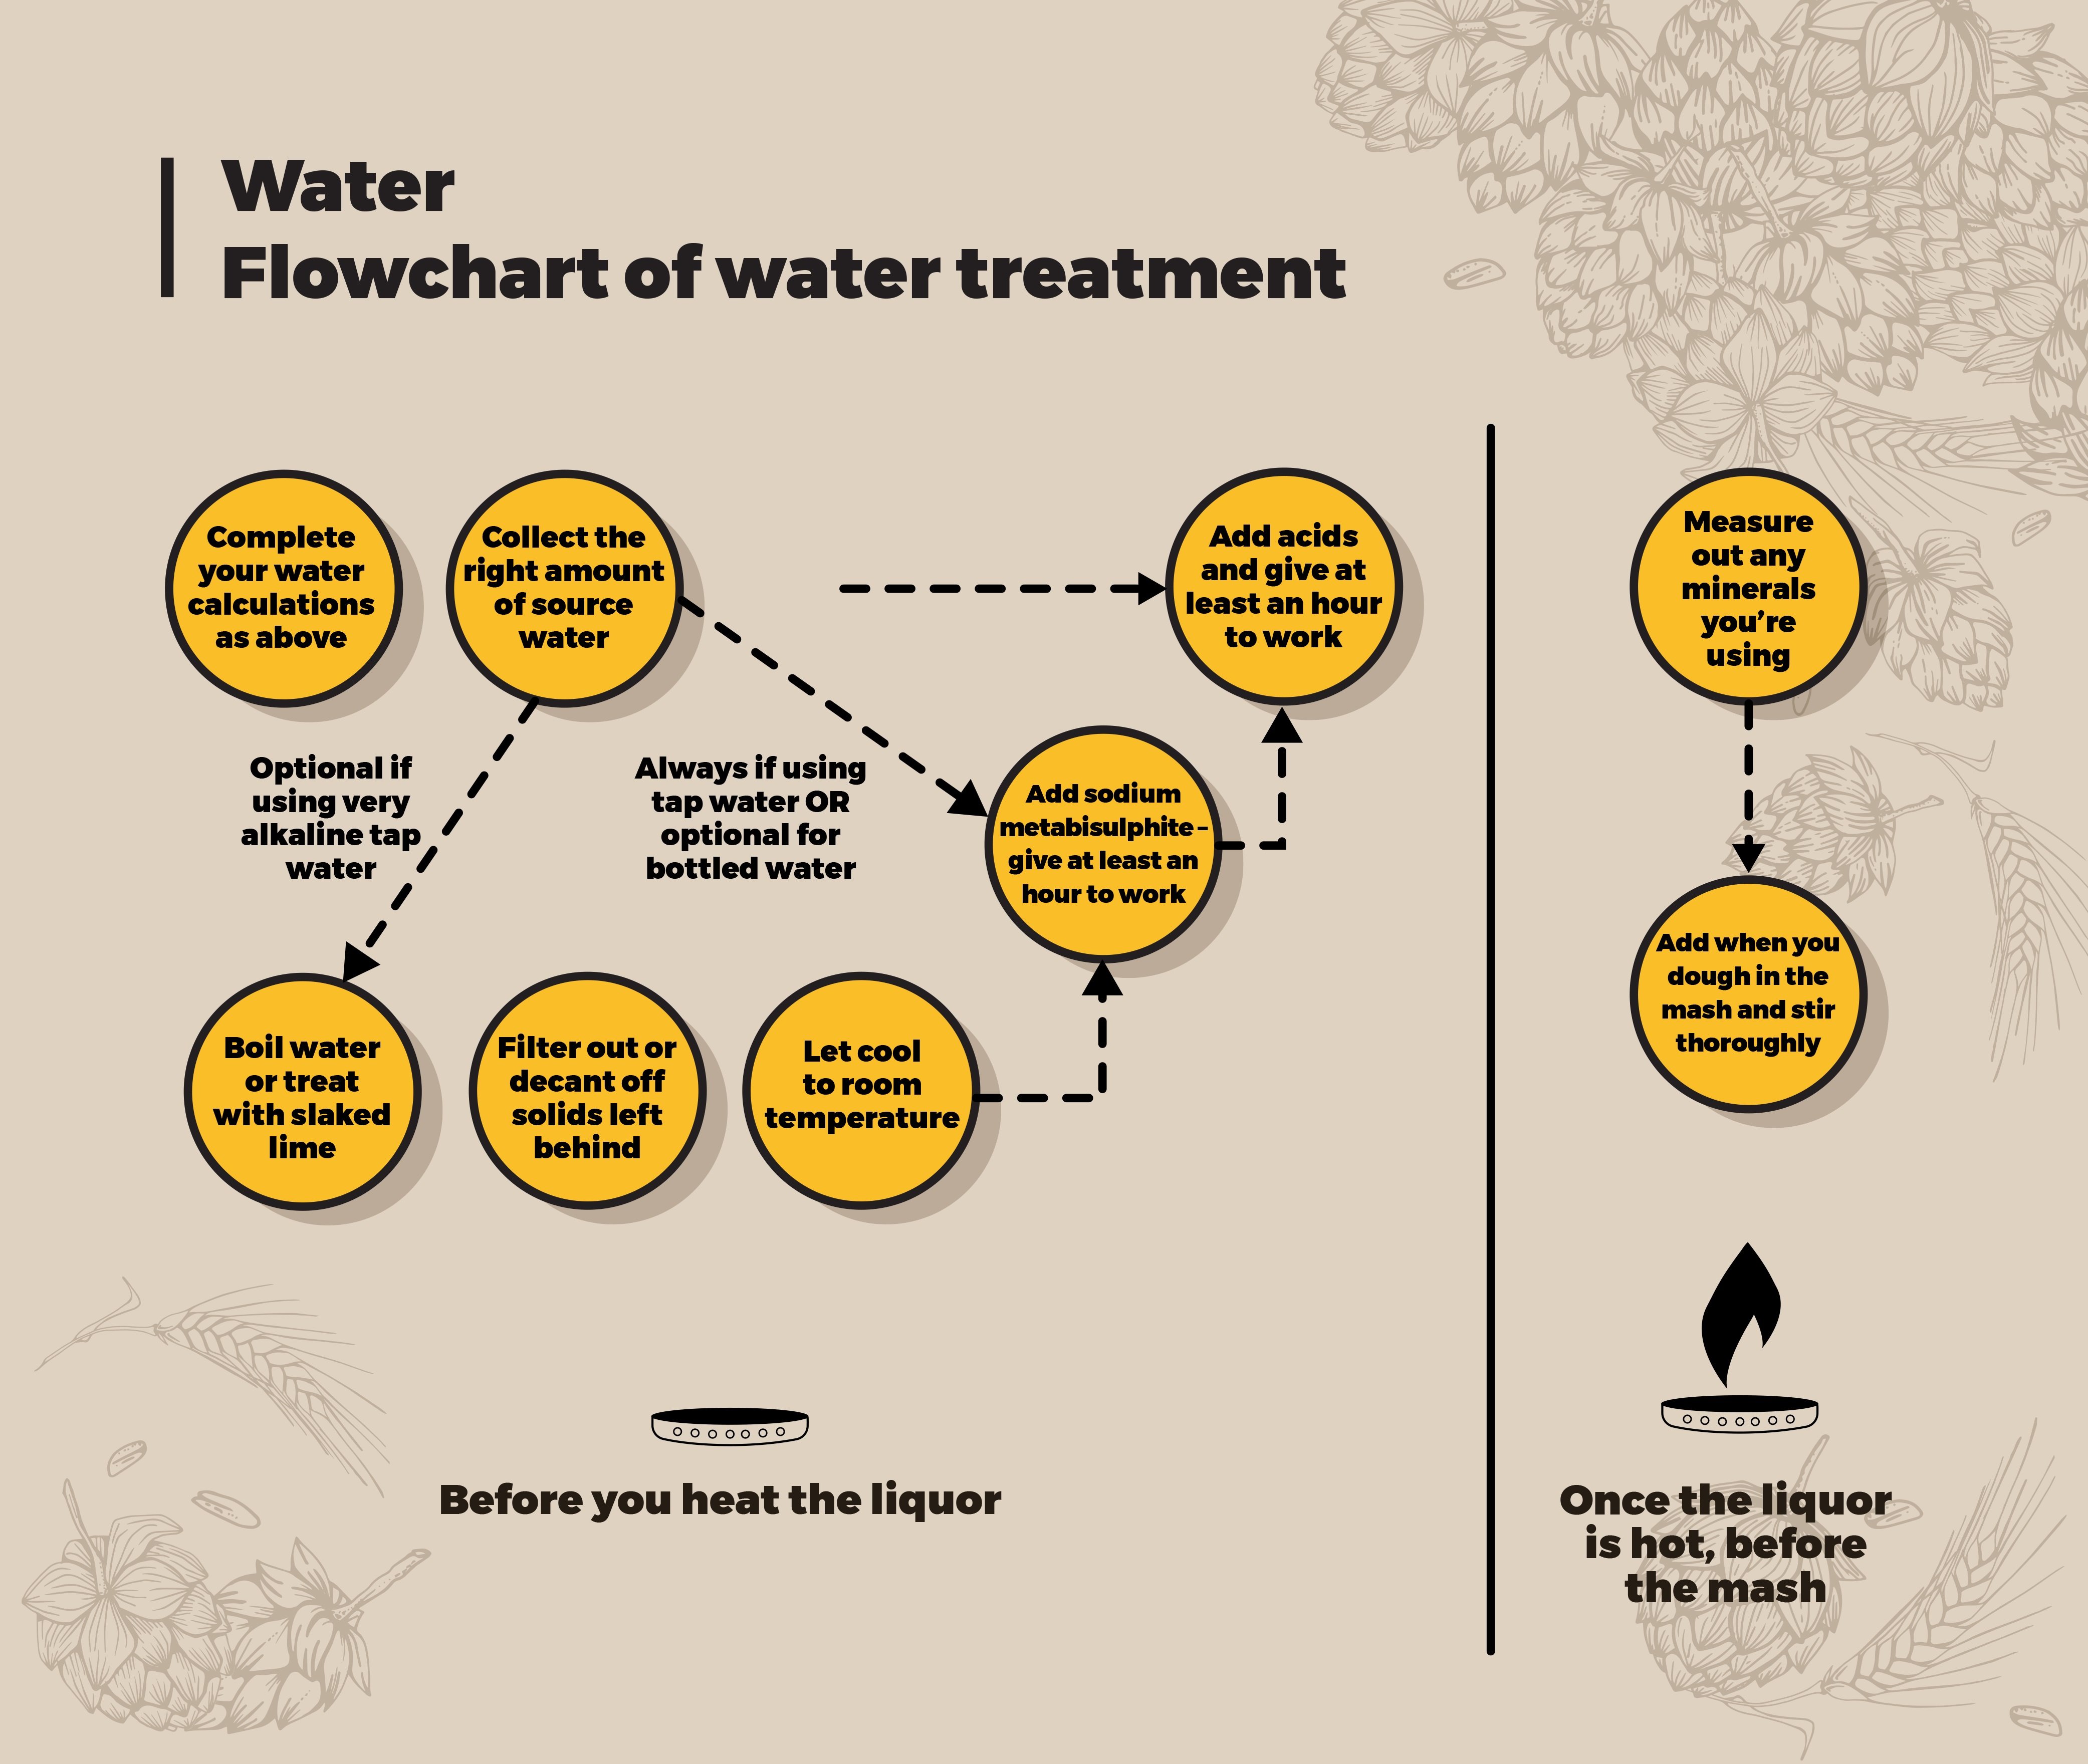
As an example, if you’re using tap water, but you’re not boiling it or using slaked lime:

1. The afternoon before you brew, collect the amount of liquor you need.

2. Throw in some sodium metabisulphite and stir it around.

3. Before you go to bed, add your acids.

4. In the morning, heat the liquor. If you have a Grainfather, you could use the delay function to start heating before you wake up.

5. While the liquor is heating, measure out your minerals and your grain.

6. Dough in and add the minerals at the same time.
Water lot of recipes
(Yes, we know we already used that pun.)
The science-y bit is done – hooray!
Next we’ll look at some of our favourite recipes to see what kind of water profile works best…
