Make your own great wine at home
Making wine at home doesn’t have to mean growing grapes and tramping on them in your bathtub (unless that’s your thing) – there’s a wide range of great quality and simple kits available. Let’s take a look!
What can I make?
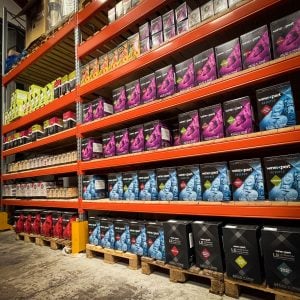
From standard red, white, and rosé styles, to single grape varietals, and even fruit wines, we’ve got a kit for just about any kind of wine you’d like to make.
Simpler and less expensive kits will usually include an amount of grape concentrate and need bulking out with sugar. More expensive kits will generally include more (and better quality) grape juice, and sometimes also additions like oak chips to give a more authentic result.
Just as with beer kits, the overall quality of kits has risen greatly in the last few years, and you can get excellent results with even the cheapest kits.

What do I need?
The good news for anyone who already makes beer (or cider!) is that you already have all the equipment you need. And if you don’t already, we’ve put together a special set.


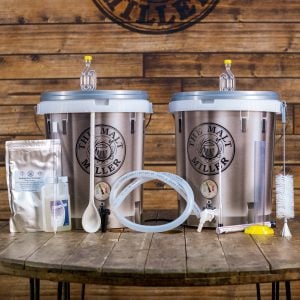
Wine fermentation and bottling starter set
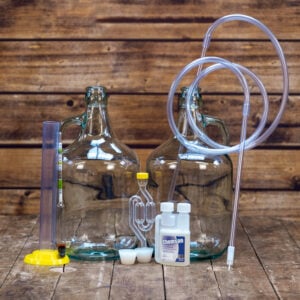
This set includes everything you need to ferment and bottle a 30 bottle wine kit:
- 1 fermenting bucket for primary fermentation with a tap and airlock
- 1 fermenting bucket with tap, airlock, and bottling stick – for your secondary conditioning and bottling
- Silicone tubing for transferring the wine between fermenters
- A hydrometer with a trial jar
- A bottle cleaning brush
- Sodium Percarbonate cleaner
- Chemsan no rinse sanitiser
You can also add an optional heat belt if you’re making your wine in a cold area (like a garage over winter).
We also provide a smaller set designed for 6 bottle wine kits.
We sell bottles, corks etc. separately, but you can very easily recycle commercial wine bottles, especially ones with screw caps. This is probably the simplest way to get started!
Fining wine
Almost all wine kits will include some finings to help clear the end product. White wines in particular can have a lot of proteins that will make the wine turn cloudy as it warms up, and finings will help pull these proteins out of suspension, leaving your wine crystal clear.
One fining often used is bentonite, a type of clay. This is highly adsorbent: when added to a liquid, it will draw any solids in the liquid towards it. As strange as it might seem to add clay to your wine, it won’t make it muddy! Instead, the bentonite will swell up as the proteins and other haze-forming compounds stick to it, then it will fall harmlessly to the bottom of the fermenter.
How do I do it?
You’ve got your wine kit, and your equipment – what next?
The first step is always to thoroughly sanitise your equipment. Just as with beer, or any other kind of beverage, you want to avoid the risk of any infection that might spoil or affect the taste of your wine.
Then study the instructions for your particular kit! Even kits from the same range can sometimes have very different methods for best results.
As a general rule, you’ll usually start with water and add the grape juice or concentrate to this. At this stage, you can adjust the recipe to your preferred strength by adding more or less water (more water will lower the alcohol, less will increase it).
If your kit includes oak chips, we recommend putting these into a hop sock or muslin bag. These keeps the chips together and makes your life easier when racking the wine off.
Next you’ll add yeast, then seal up the fermenter with an airlock. Test the wine after the length of time recommended in your kit’s instructions with a hydrometer to make sure it’s finished fermenting.
Now comes the different part to most beers or ciders. Most wines benefit from being racked to a secondary vessel, where they can be cleared with additional finings prior to bottling. You may also choose to degas your wine (more on that below).
Degassing
As yeast ferments the sugars in the grape juice, it releases ethanol (alcohol) and carbon dioxide. However, most wines are served still, so that carbon dioxide needs to be released. This process is called degassing.
Carbon dioxide forms carbonic acid when it’s dissolved into a liquid like wine, so wine that isn’t degassed will taste sharper and more acidic. Many wines will also struggle to clear properly while there is still carbon dioxide in solution.

Wine will degas naturally in the secondary fermenter or a barrel, but this can take several months or longer. So many home winemakers degas manually by stirring their wine. Just like stirring a fizzy drink, this makes the carbon dioxide escape, and you may even see your wine foam as it does so.
You can get special tools for degassing, but a simple spoon or brewing paddle will work just as well. Be careful as you stir the wine not to agitate the surface too much to avoid introducing too much oxygen.
Because you’re stirring up your wine, degassing like this is best done when you’ve racked it off any sediment – otherwise you might get all that sediment back into suspension. If your kit includes finings to be added to the secondary fermenter, it’s a good idea to degas the wine before you add these finings.
Check out our video on making wine kits, and remember to subscribe to our YouTube channel for all the latest brews and reviews from The Malt Miller.

