So you want to start kegging your home brew
One of the most asked questions we get asked is what do I need to start kegging my beer?
We offer three kinds of corny keg, reconditioned ones, new TMM kegs and new AEB kegs.
Whats the difference between the kegs?
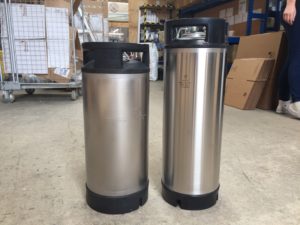
Well the new corny keg is completely new, made in Italy, they are taller in height and slimmer in width, and have never been used.
The TMM kegs are also new, but these are manufactured in China, which helps to save a small amount of cost off the keg.
The reconditioned kegs which have been in service previously for other liquids like soda syrup such as coke, they come with new seals, fully cleaned and gassed to ensure they hold pressure, they also go through a machine polishing process which gets them looking like a new item but does leave some metal polish on the black ends that you will find transfers to your hands when you start to use them.
When choosing between the types of kegs you need to consider not just the price difference but the size difference, as if you plan to store the kegs in a fridge you might not be able to fit two of the recon kegs in there due to the extra size in width, but then in the same way you might not be able to fit two of the new ones in your planned fridge because of the extra height.
So once you’ve selected your keg your next consideration is gas, how will you be gassing the keg? The most common method is to source a gas bottle from a local supplier, be warned these vary in price and terms of purchase. Some suppliers will try to get you to sign up to a rental scheme, some will want to charge you ridiculous amount of money and say you can bring the bottle back and then have it filled up for less. But to give you an example, we buy our gas in from ALDD, a local supplier who delivers us a full sized bottle for £23.00, so really do shop around, or ask your local home brew group who others are using.
The other method to gas kegs is to use soda stream bottles if you can’t find a supplier to buy from, these are more accessible, but long term not as cheap as the full size bottle.
Ok, so now you have your gas sorted you can choose a regulator that fits your needs.
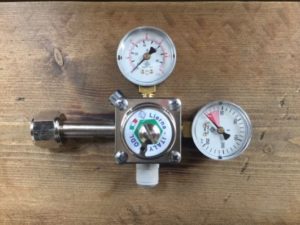
Our Premium Regulator is perfect for use on a full size Co2 bottle, and unlike a welding regulator this will adjust pressure up and down according to your desired pressure. You can also choose to use this with a soda stream bottle too by using it with the correct soda steam adaptor.
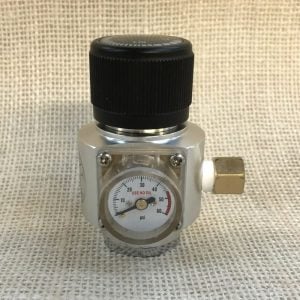
The Universal Regulator has a number of uses when used with the relevant adaptor. You can choose to use it on a full sized gas bottle with adaptor A. If you wanted to use it with a soda stream bottle you need to get adaptor C and adaptor B , the reason you need both is that B fits into C. This regulator is also great for mobile dispense due to its size, so if you’re going to be taking a keg to a friends house or out for a picnic etc you can use it with adaptor B and the Co2 bulbs to top it up.
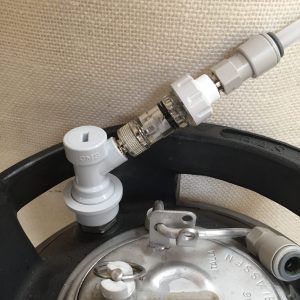
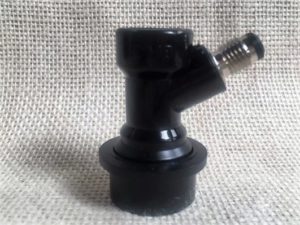
So now you have your gas, and your regulator to get the gas out the bottle, so now you need to connect this to the keg. This is the nice simple part, both the regulators come with a John Guest connection included. John Guest fittings are a simple push fit style link, that means you can easily connect everything together and also take it apart to expend to your system or for cleaning. The tubing that you then use from the connector is 3/8 gas beer line . To connect the other end to the keg you will need to have a gas in disconnect, you can do this with a couple of products, but the main choice is to continue using John Guest connectors or to use a barbed fitting, as mentioned previously, John Guest gives you the advantage of easy assembly, easy to expand, and easy to clean down. To continue using John Guest fitting you would need to choose a threaded Gas In Disconnect, and combine it with a John Guest 1/4 FFL Female to 3/8″ Line Adapter then you can just push in your 3/8 gas line. Another little addition that you can also consider adding in is a Disconnect Check Valve, this prevents any liquid from travelling up your gas line, as if that happens it can get in to the regulator and end up stopping it from working, its certainly cheaper than a new regulator is.
Now on to the dispensing side, so we first start out with a Liquid Out Disconnect, again as on the gas side you have similar choices, and I’m going to talk through using the threaded option as that is what I use at home and always recommend. So you connect a threaded Liquid Out Disconnect to a John Guest 1/4 FFL Female to 3/8″ Line Adapter just as we did with the gas side. Now its the line and tap, to keep it simple the easy choice here with now need to think about drilling holes in fridges, or length of line is to simply hook up the Premium Party Tap that we sell. The beauty of this is that the line reduces in size from 3/8 to 3/16, the purpose of which is to reduce the flow of the beer, this then helps to prevent fobbing (too much foam). You can use these easily for mobile dispense or even for a couple of kegs in the fridge.
There are of course other options for the dispense of beer, such as using an Intertap, you can mount these either directly on the keg using a Tap Shank adaptor, or through the door of a fridge using the Long Shank adaptor, or even on the top of a fridge using a Tower, it all works in pretty much the same way and just connects up using the John Guest fittings and we’ll cover that off more in our post about building a kegerator later on.
All of the above products can be ordered as individual items on The Malt Miller website by using the links in the post, or you can click and order the Complete Keg Starter Kit and then add on extra kegs and connectors accordingly.


Great advice and detail there to help people decide which route they want to go down. But do you have any advice on how to transfer the brew to the kegs and how to carbonate them, and how they should be filled if they are going to be sitting around for a few weeks/months like a commercial keg could be?
Hi, I’m having trouble with my corny keg setup. I wasn’t able to dispense anything (other than a dribble) for ages. It turns out that my disconnect was not seated correctly on the keg. So, I seated them correctly, bought a new soda stream refill.
I can now get beer out the party tap, but only very very slowly – couple mins per pint! Even if I crank up the pressure to 2 bar. Am I still missing something?
Hey Ben,
Yep, defo something wrong. My bet is that the disconnect for both gas and liquid are not seated on the post correctly. Use some keg lube on them, makes it much easier. Double check you have them on the correct way round. Black for beer out, Grey for Gas in. Then, look at a block in the dip tube or post of the beer out side. If all else fails call us and we can talk you through it.