A Journey Into Czech Lager with Budvar pt4
In this final part of our special blog series, we’re bringing it back to homebrewing with our tips on how to make your best pilsner.
Ingredients
Budvar work hard to source the best quality ingredients for their pilsner, and they have long-standing relationships with farmers and producers. Some of the same families have exclusively provided ingredients for Budvar for decades – the benefit of Budvar being owned by the Czech state. Fortunately, we have some great connections and ingredients too!
Malt
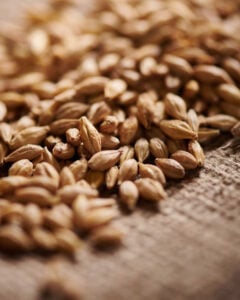
For malt from authentic Moravian barley, grown in the same region as Budvar’s, choose Weyermann Bohemian Pilsner. Weyermann also have a premium version that’s floor malted in the traditional way, again grown in Moravia in the Czech Republic.
There are also British malt options you might also consider. Many British lager malts have different levels of protein than Czech barley, and are better suited to single infusion mashes than the decoction methods Budvar use. However, Utopian Brewing have collaborated with Warminster Maltings to produce a floor malted lager malt that’s explicitly designed to deliver the best qualities of Czech malt.
Crisp Malting have gone down a similar road with their Haná heritage malt. Named after the Haná region in Moravia where pilsner malts were first produced, this is grown in Norfolk from original Czech seedstock, then floor malted.
Hops
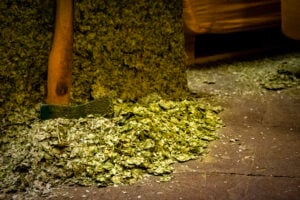
The only hop variety Budvar use is Saaz, which are grown in Žatec in the Czech Republic. Saaz is actually the German name for Žatec, hence the name of the hops!
Budvar only use whole leaf hops, so if you want to follow suit, we’ve got you covered. Whole leaf hops can be a challenge for homebrewers, with blocked valves a real risk, so you might choose to use a hop sock to contain the cones.
Pellets are a bit friendlier to use, so we also offer Saaz pellets. Another option is the new LUPOMAX Saaz Pellet, which are super concentrated and selected to provide the most consistent true-to-type flavour and aroma possible. Because they’re so concentrated, with LUPOMAX you only need 70% of the amount of pellets you’d usually use.
Yeast
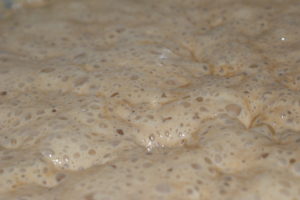
Budvar’s yeast dates back to the founding of the brewery in 1895, and it’s perfectly adapted to their pilsner.
Yeast labs can be pretty cagey about where their strains are sourced from. However, White Labs WLP802 is widely thought to be the exact strain that’s used. Another great choice is Escarpment Czech Lager. Most other Czech pilsner strains are sourced (probably) from Pilsner Urquell. Their pilsner is drier and more hop-forward than Budvar’s, in large part due to differences in the yeast.
You should expect to make a yeast starter to get the right results. More on this below.
Water
Sourced from an underground aquifer accessed by artesian wells, Budvar’s water is, to put it mildly, unique. It is incredibly soft and low in minerals, and they do no treatment whatsoever apart from filtering out sediment.
There are several published Pilsner water profiles, although many of these aim for profiles closer to that used by Pilsner Urquell. Some are also based on what comes out of the tap in Plzeň – which is not what is used in the brewery.
With liquor for a pilsner, the key points to aim for are low calcium, low alkalinity, with balanced and low overall levels of sulphates and chlorides. While we typically suggest a minimum level of 100ppm calcium, levels of 50ppm or less are fine here – the Budvar yeast is well-adapted to such levels. Aim for under 100ppm total sulphates and chlorides as well, and minimise magnesium and sodium.
If you want to exactly duplicate the water profile, Budvar have kindly shared it with us:
- Calcium – 12ppm
- Magnesium – 7ppm
- Sodium – 6ppm
- Chlorides – 5ppm
- Sulphates – 9ppm
- Alkalinity (as bicarbonate) – 23ppm
To achieve such low concentrations of minerals, you might consider using a mix of bottled water with your tap water, or starting from RO water.
The brew day

With your ingredients gathered, it’s time for brew day!
First of all, though – expect this to be a long one. Budvar use a double decoction mash and a long boil, then the wort needs to be chilled extra cold. We estimate our decoction mash method will take you approximately three hours. So put aside a whole day!
We also strongly suggest you make notes. For such a “simple” beer, the method can get complicated, so don’t be afraid to write out a schedule and mark it off as you go. Make notes along the way of any improvements you’ve done next time. Once the pilsner bug bites, you’ll be brewing it again and again…
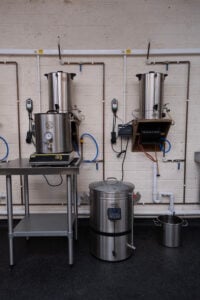
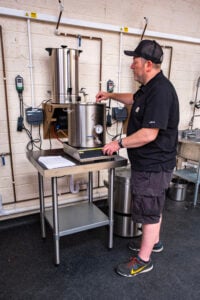
Our adaptation of Budvar’s schedule requires two mashing vessels, each with their own temperature controls. We used a Grainfather G40 and one of our 25L kettles with an induction hob. We used the kettle as our “primary” mash tun and the G40 as our “decoction” vessel to take advantage of the programmable temperature steps on the Grainfather.
Please note that one of your vessels must be large enough to hold 75% of your total liquor and the full amount of grain – noting also that grain displaces approximately one litre of water for every kilogram of grain.
The decoction schedule
Collect all your liquor and make any adjustments to the whole amount. Add 30% of the liquor to your primary mash tun, and 45% of the liquor to your decoction vessel. This will leave 25% of the liquor for sparging at the end.
In our brew, we began with 40L of liquor, so 12L went to our kettle, 18L to our G40, and 10L was kept for sparging.
Raise both vessels to 38°C and dough in – 50% of the grain in each vessel. You’ll hold this temperature for 20 minutes in the primary mash tun. At the end of this rest, raise the primary mash tun to 50°C and hold it there.
The decoction vessel gets 15 minutes at 38°C then is raised up to 65°C. Once it’s reached that temperature, it rests there for 15 minutes; then up to 75°C for 20 minutes. The last part of the first decoction is to raise up to a boil for 20 minutes.
If you’re using a Grainfather like us, you can’t programme the system to raise up to 100°C, so we used 99°C for this last step.
After the decoction has completed the boil, blend the two mashes together. Use the larger of your two vessels for this. We used the G40 and simply poured the mash from the 25L kettle into the Grainfather. Always be careful when moving hot liquids – and be extra careful here as there is boiling hot grain involved.
Blending the two mashes should reduce the overall temperature to approximately 65°C. If not, consider using a chiller, such as a Grainfather counterflow chiller, to reduce the temperature. If you’re only a degree or two higher, stir the mash to help it cool down – it is important to hit the correct temperature. Then hold the combined mash at 65°C for 20-30 minutes. Now is a good time to get a cuppa and take a breather before the next stage!
Once the 65°C rest is complete, it’s time for the second decoction. Carefully split the mash – including the liquor – approximately 50/50 between your two vessels. Your primary mash tun will remain at 65°C for the duration of this decoction, so you can turn your attention to the other vessel.
Raise the decoction vessel to 75°C and hold there for 10 minutes, then bring to a boil for 20 minutes. As with the first decoction, we programmed our Grainfather to 99°C for this step.
After the boil, blend the two portions once again. Be even more careful, as after blending the temperature of the mash should be approximately 75°C, well into scalding temperatures.
Make sure the blended mash is at 75°C, again cooling down as necessary to hit this, then hold it here for 10 minutes. After that you’re ready to sparge: heat the remaining 25% of the liquor and sparge at 75°C.
Summary
- FIRST DECOCTION
Primary: 38°C/20 min, 50°C and hold
Decoction: 38°C/15min, 65°C/15min, 75°C/20min, boil/20min - Blend both portions, hold at 65°C for 20 min
- SECOND DECOCTION
Primary: 65°C and hold
Decoction: 75°C/10min, boil/20min - Blend both portions, hold at 75°C for 10 min
- Sparge at 75°C
Fermentation and maturation
The boil is relatively simple – just longer than you might normally do, at 90 minutes instead of 60. After this, cool down the wort to 7°C. Depending on your chilling equipment, this might be a challenge. For instance, with an immersion, counterflow, or plate chiller, you can only go as low as the temperature of your groundwater. It can be more efficient to chill the wort to a reasonably low temperature and then chill it further in your fermenter – using either a fermentation fridge or glycol chiller if you have one.
Don’t be tempted to pitch the yeast before it’s down to 7°C: consistently cool temperatures are the key to success here. After pitching, you can let the temperature rise naturally, but don’t let it exceed 10°C.
It is important to pitch the right amount of yeast. Budvar pitch at a rate of 15-20 million cells of healthy, active yeast per ml of wort. For a 23L homebrew, that’s around 400 billion yeast cells – a massive amount more than a single packet of liquid yeast includes. (If you’re making a 40L batch, that’s 700 billion cells!).
We strongly recommend you make a yeast starter to make sure you start with the right amount of yeast and that yeast is ready and raring to go. As Jeremy from Utopian Brewing says, don’t treat your beer as a yeast starter.
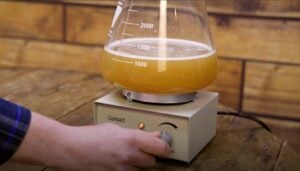
The next step is to wait. Be patient and let the yeast do its thing. Budvar allow at least twelve days for primary fermentation to complete. We’ve found it can sometimes take a little longer than this. Make sure you take gravity readings to get an accurate read on fermentation, and leave the beer for at least 48 hours after you achieve a stable final gravity just to be sure.
Once you’re at final gravity, slowly lower the temperature by 1°C per day until you reach 2°C. Again, don’t be tempted to take shortcuts. You want to let the yeast acclimatise to each new temperature and relax so it doesn’t release any off flavour compounds.
When you reach 2°C, it’s time to transfer the beer away from the yeast. The next stage is to leave the beer to lager at 2°C for a minimum of two months, or longer if possible. If you have a conical fermenter, you could dump the yeast and leave the beer in situ – but you’ll tie up that fermenter while lagering. A closed transfer to a keg is a good option.
Try to ignore the beer while lagering – just make sure it keeps cool. It will go best if you leave it alone! This period is where a lot of the magic happens, with the yeast cleaning up and remetabolising fermentation byproducts, “green” alcohol flavours smoothing out, and the flavours maturing. The yeast will also naturally fall out of suspension during this time, giving you crystal clear beer without the need for any finings.
Carbonation and serving
Budvar complete lagering in a pressurised tank with a spunding valve set to 4PSI. From our own experience, forced carbonation works equally well. If you prefer priming for natural carbonation, we recommend you treat this as another stage of primary fermentation, following the same temperature profiles and avoiding fast rises in temperature (more than 1°C per day).
The authentic method of serving Czech pilsner is with a side pour tap, such as the Nostalgie or Baroko from Lukr.
And what better to pour into than a proper tankard… of course, we like ours best!

We’ve put together a special recipe kit with our selection of ingredients and our full method for making authentic homebrewed Czech pilsner.
Plus you can check out our four part video series with Budvar as we dig deep into the secrets of Czech lager! And remember to subscribe to our YouTube channel for all the latest brews and reviews from The Malt Miller.

